
EasyCards Cardholder H5 Guide#
This guide is for invited EasyCards card members (vcc_member). It follows the actual H5 journey through account activation, two-factor authentication, identity details, cards, top-up requests, transactions, and profile settings.
Cardholder H5 is not the merchant administration portal. Card authorization, member administration, top-up approval, and two-factor authentication reset are handled by an account administrator in Merchant Portal.
UI images come from the H5 project's Chinese and English design assets and use sample accounts, balances, and transactions. The steps, permissions, and status guidance follow the current H5 code behavior.
Documentation sample safety notice: Accounts, balances, card numbers, verification codes, top-up information, and transactions shown in the images are fictional or redacted.
Never use any card information, address, QR code, or other sample value from this guide for a real top-up, transfer, or payment. For a real operation, use only the information currently displayed after the cardholder signs in to H5.
Cardholder H5 quick links (an invited account is required): Sign in · My cards · Transactions · Profile · Forgot password. Account activation must use the unique link in the invitation email; a fixed public link cannot replace it.
1. End-to-end journey#
flowchart LR
  A[Administrator sends invitation] --> B[Open invitation link]
  B --> C[Set password and activate]
  C --> D[Sign in]
  D --> E[Set up TOTP on first sign-in]
  E --> F[Complete identity details]
  F --> G[Wait for identity review and card opening]
  G --> H[View card in My Cards]
  H --> I[View transactions or request a top-up]
The following boundaries apply to all operations:
- H5 is only for invited card members. It does not offer self-registration.
- A cardholder can only view and operate cards assigned to that cardholder.
- A top-up in H5 is a top-up request. It requires administrator approval and does not credit the card immediately.
- H5 does not provide member administration, card authorization, card-product configuration, or API configuration.
2. Accept an invitation and activate the account#
2.1 Open the invitation link#
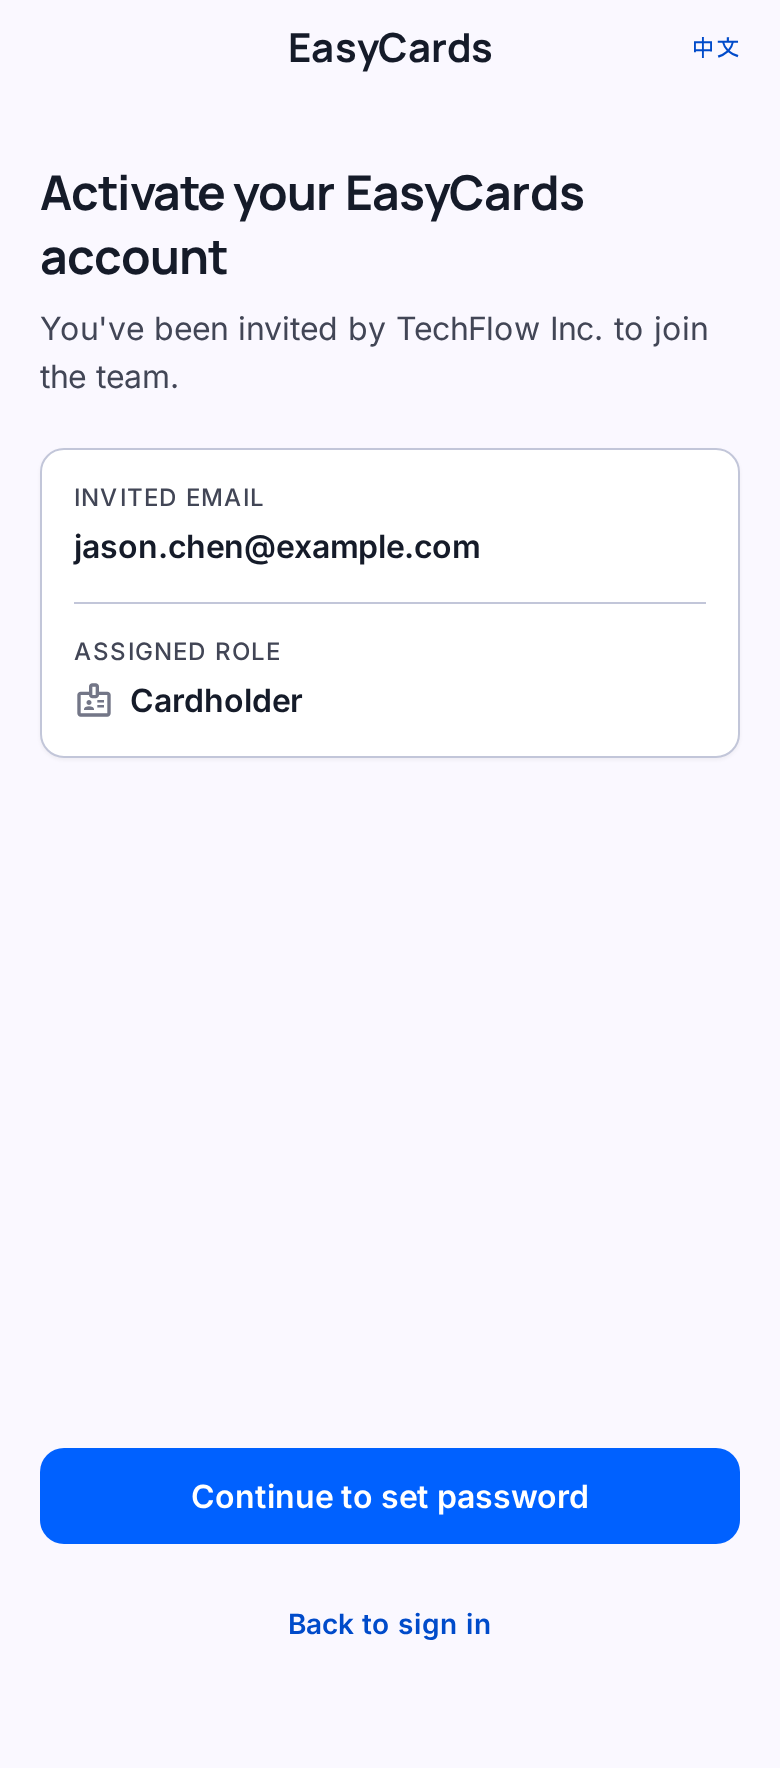
After the administrator sends the invitation, open the link in the invitation email. The page verifies the invitation and displays the bound email address and inviting account.
The invited email address is determined by the invitation link and cannot be changed on the activation page.
2.2 Set a sign-in password#
The password must meet all of the following requirements:
- 8–128 characters;
- at least one uppercase English letter;
- at least one lowercase English letter;
- at least one number;
- at least one special character.
Steps:
- Enter a password that meets every requirement.
- Enter the same password again.
- Select Complete activation.
- When activation succeeds, select Sign in.
If the invitation is invalid or expired, contact the account administrator for a new invitation. If the account is already activated, sign in directly. Do not reuse an invitation that has already been activated.
3. Sign-in, TOTP, and password reset#
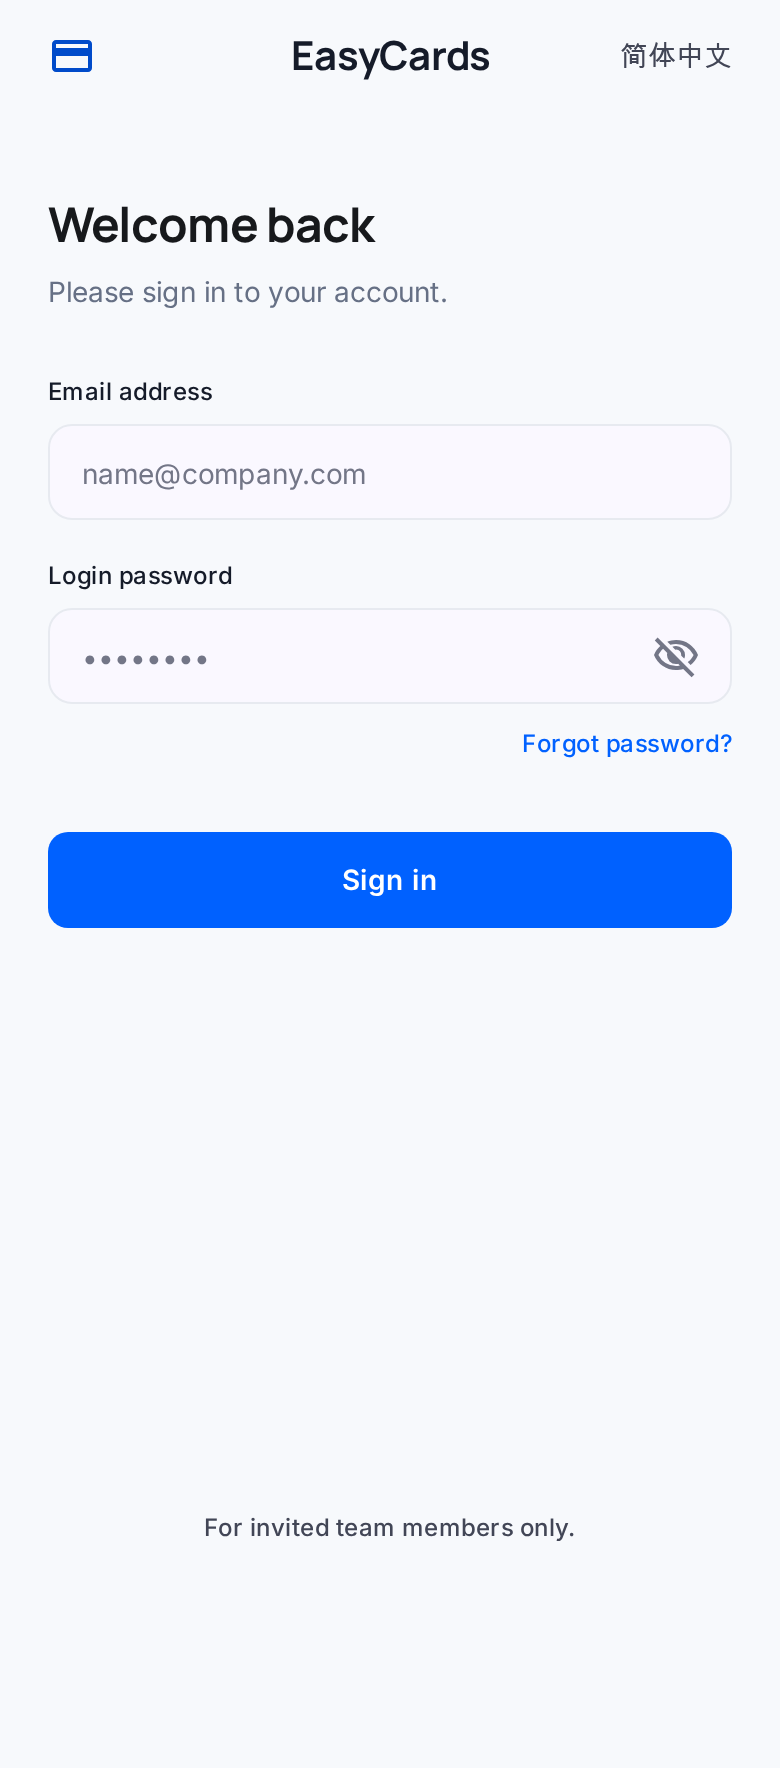
3.1 Regular sign-in#
- Enter the invited email address.
- Enter the sign-in password.
- Select Sign in.
- Complete TOTP verification when prompted.
H5 blocks sign-in when the member account is disabled. Contact the account administrator to confirm the member status.
3.2 Set up TOTP for the first time#
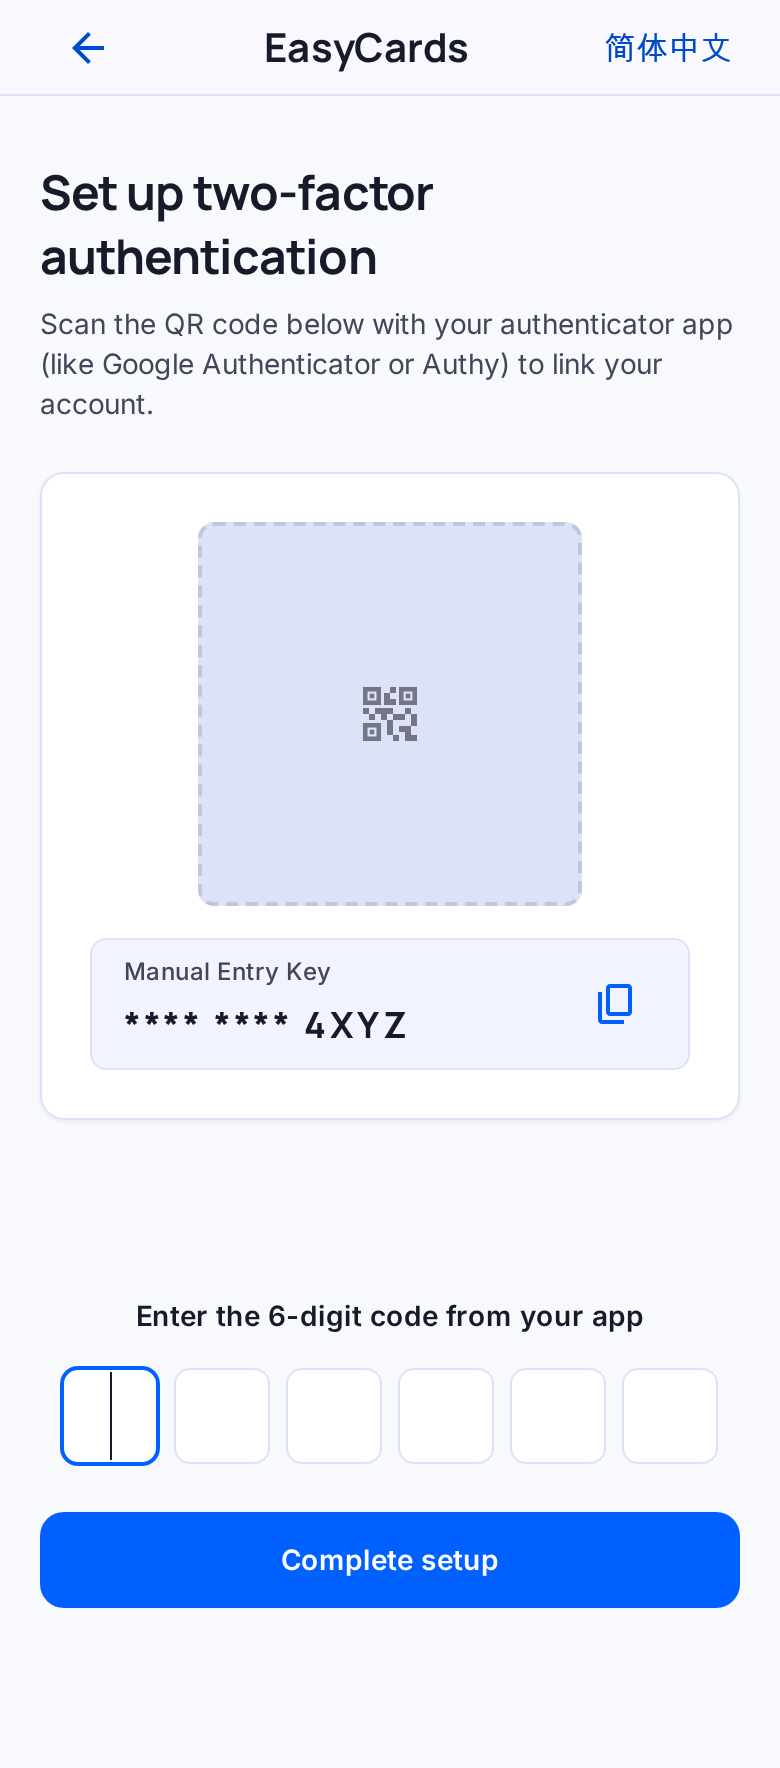
The first sign-in requires an authenticator app:
- In Google Authenticator, Microsoft Authenticator, or another compatible TOTP app, choose to add an account.
- Scan the QR code displayed in H5.
- Enter the current six-digit code from the authenticator in H5.
- After verification, TOTP is enabled and H5 opens My Cards.
Keep access to the authenticator secure. H5 cannot reset TOTP. If the device is lost, the authenticator is unavailable, or it must be bound again, contact the account administrator or EasyCards Support.
3.3 Regular TOTP verification#
After setup, sign-in and sensitive card operations require the six-digit dynamic code generated by the authenticator. The code changes approximately every 30 seconds.
If a code is invalid or expired:
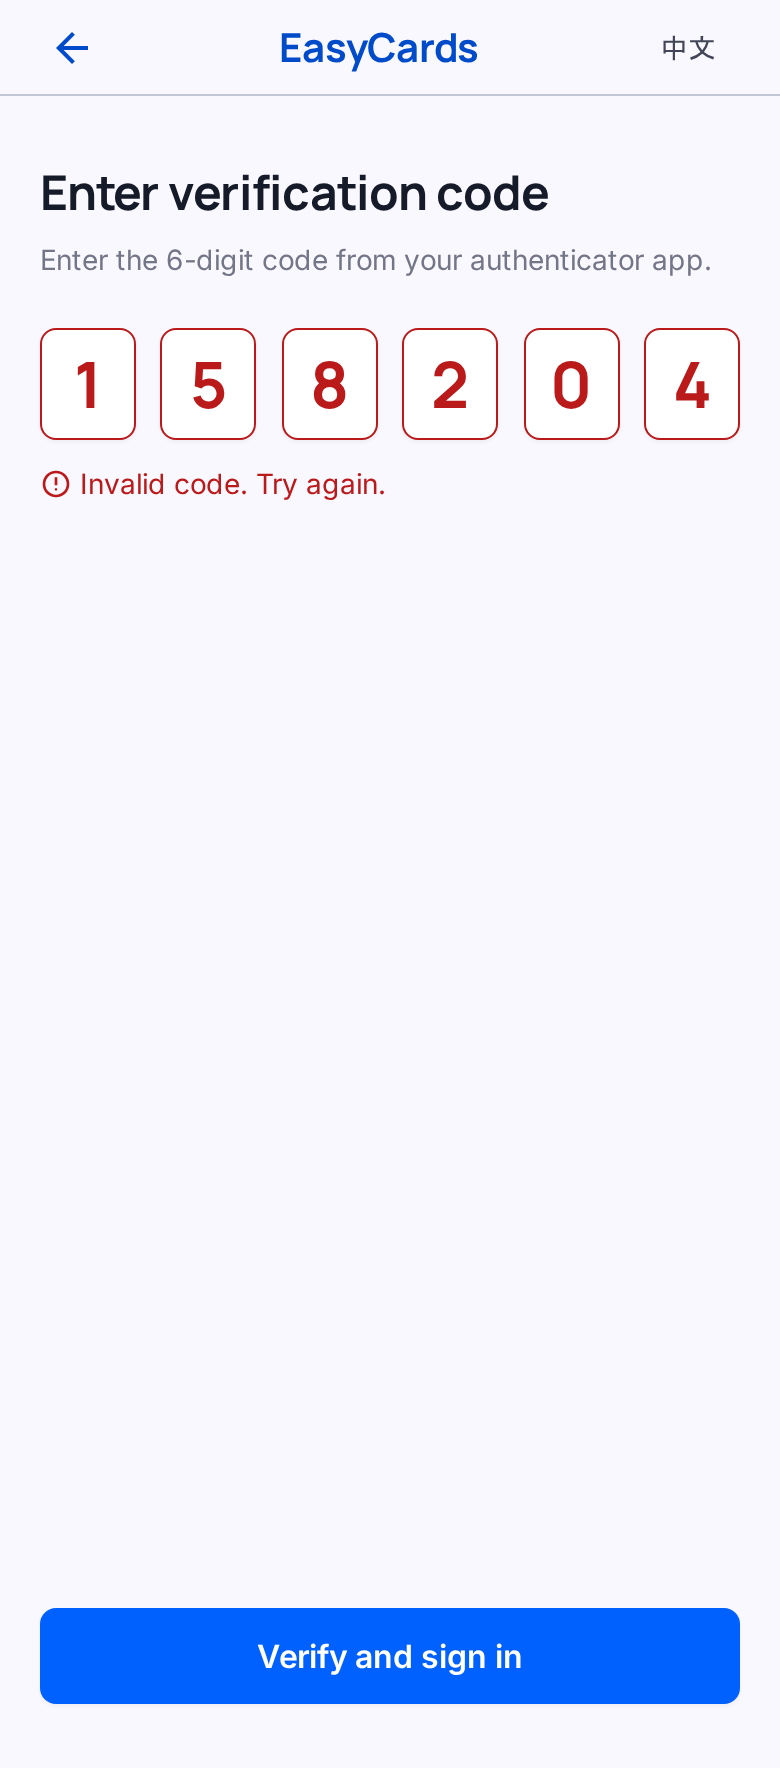
- Wait for a new code and enter it again.
- Confirm the phone time is correct and the authenticator clock is synchronized.
- If the verification session has expired, return to the sign-in page and sign in again.
3.4 Forgot or reset password#
- Select Forgot password? on the sign-in page.
- Enter the sign-in email address and select Send reset email.
- Open the password-reset link in the email.
- Set a new password using the same strong-password rules as activation.
- After the reset succeeds, sign in with the new password.
The page enforces a 60-second wait before another reset email can be sent. If the link is invalid or expired, request another reset email.
4. Complete identity details (KYC)#
4.1 KYC access rules#
After sign-in, if required identity details are incomplete, H5 shows the identity form before allowing access to cards, transactions, or the profile. Normal pages become available only after the required details are complete and the system permits access.
The page selects a flow based on the current state:
| Page state | Information required | Submission result |
|---|---|---|
| Complete your identity profile | Identity, contact, and residential-address details | Saves the basic profile and continues the review |
| Complete your details to open your card | Basic profile, address, and fields required by the current card product | Submits KYC, card opening, and activation as one flow |
| More details are required for this card | Dynamic product fields required by the current card application | Submits the extra details and continues the existing card-opening flow |
4.2 Enter basic identity details#
Enter information as it appears on a valid identity document:
- first name and last name;
- gender;
- phone country code and mobile number;
- date of birth;
- country or region of residence and nationality;
- state or province and city;
- street address and postal code.
Important input rules:
- The invited email is already verified and cannot be changed on the KYC page.
- Enter the country calling code only in the country-code field. Do not repeat it in the mobile-number field.
- The street address must be 2–40 characters and use English letters, numbers, and ordinary spaces only. Do not use hyphens or other symbols.
- The postal code must be 2–15 characters and use English letters and numbers only, without spaces or other symbols.
- Select country, state or province, and city in page order. If the city list is temporarily unavailable, try again later.
4.3 Enter card-product details#
The current card product determines the extra fields dynamically. The page may ask for an identity-document type and number, document dates, or document files. Complete only the required fields currently displayed, using the cardholder's valid documents.
File upload rules:
- JPG, PNG, and PDF are supported;
- each file must be no larger than 2 MB;
- after a successful upload, the page displays the file name and size;
- to replace a saved file, select and upload a new file.
This guide does not add document requirements that are not shown on the page.
4.4 Submit, monitor status, and retry#
On the final step, select the submission button shown on the page. A submitted form does not mean that the card has already opened.
| Application status | Meaning | Cardholder action |
|---|---|---|
| Processing | Details have been submitted and identity review and card opening are in progress | Select Refresh status to obtain the latest result |
| Action required | The application still requires corrected or additional details | Select Complete card details and follow the prompts |
| Failed, retryable | Validation failed and the details may be corrected and submitted again | Review the reason and select Edit KYC details |
| Failed, not retryable | The application cannot continue in H5 | Retain the application number and failure reason, then contact the account administrator |
For phone, city, address, postal code, IPv4, or upload errors, correct the indicated item before submitting again. If a failure persists, retain the application number, displayed error, and time of failure, then contact the account administrator.
5. My Cards#
5.1 View and switch cards#
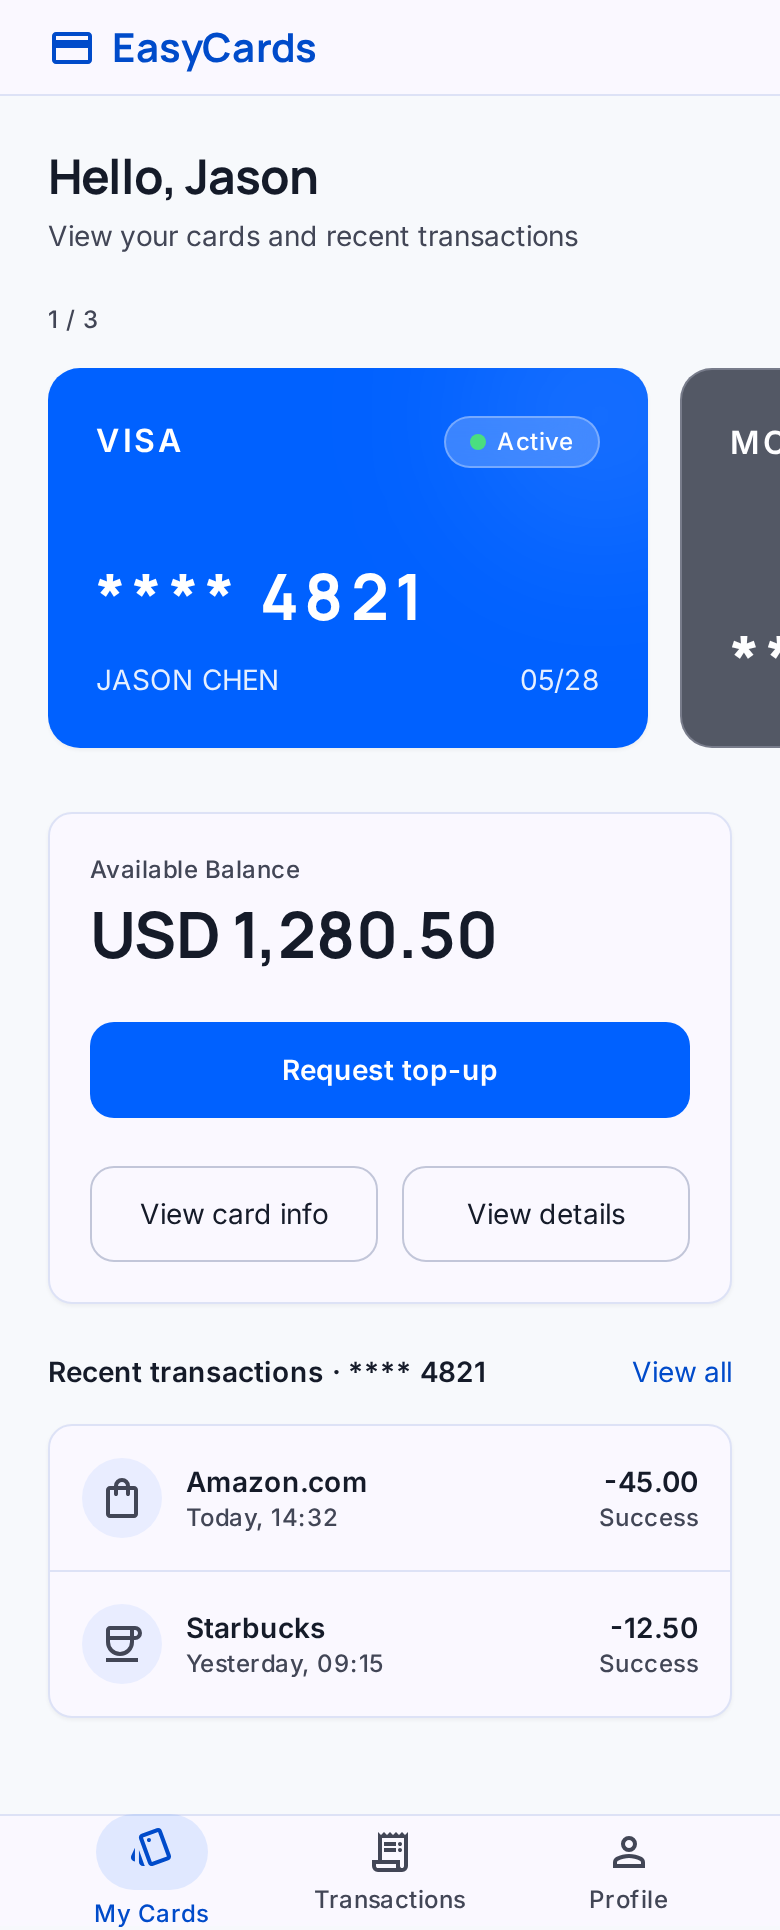
Open My Cards from the bottom navigation. The page shows the selected card's:
- scheme and last four digits;
- cardholder;
- expiry;
- status;
- currency and available balance;
- recent transactions.
When more than one card is available, use the dots below the card to select another card. Balance, details, sensitive data, top-up requests, and recent transactions always apply to the selected card. Verify the last four digits before an operation.
Closed cards appear under Card history. Their transaction records remain available, but full sensitive card data can no longer be revealed.
5.2 Refresh the balance#
- Select the target card.
- Select Refresh balance.
- Wait for the updated balance and timestamp.
Balance refreshes have a 30-second interval on the page. If the button is temporarily disabled, wait before trying again. A refresh error does not mean that the balance is zero; rely on the value after a successful refresh.
5.3 View card details#
Select Card details to view the cardholder, card product, card status, last update time, masked card number, and expiry. This view contains masked information and does not require TOTP.
6. Reveal sensitive card data#
This function is enabled only for a normal card that permits sensitive-data access.
- In My Cards, select the target card and verify its last four digits.
- Select Verify to view card details.
- Enter the current six-digit TOTP code from the authenticator.
- After successful verification, view the full card number, CVV, and expiry.
- Select Hide now immediately after use.
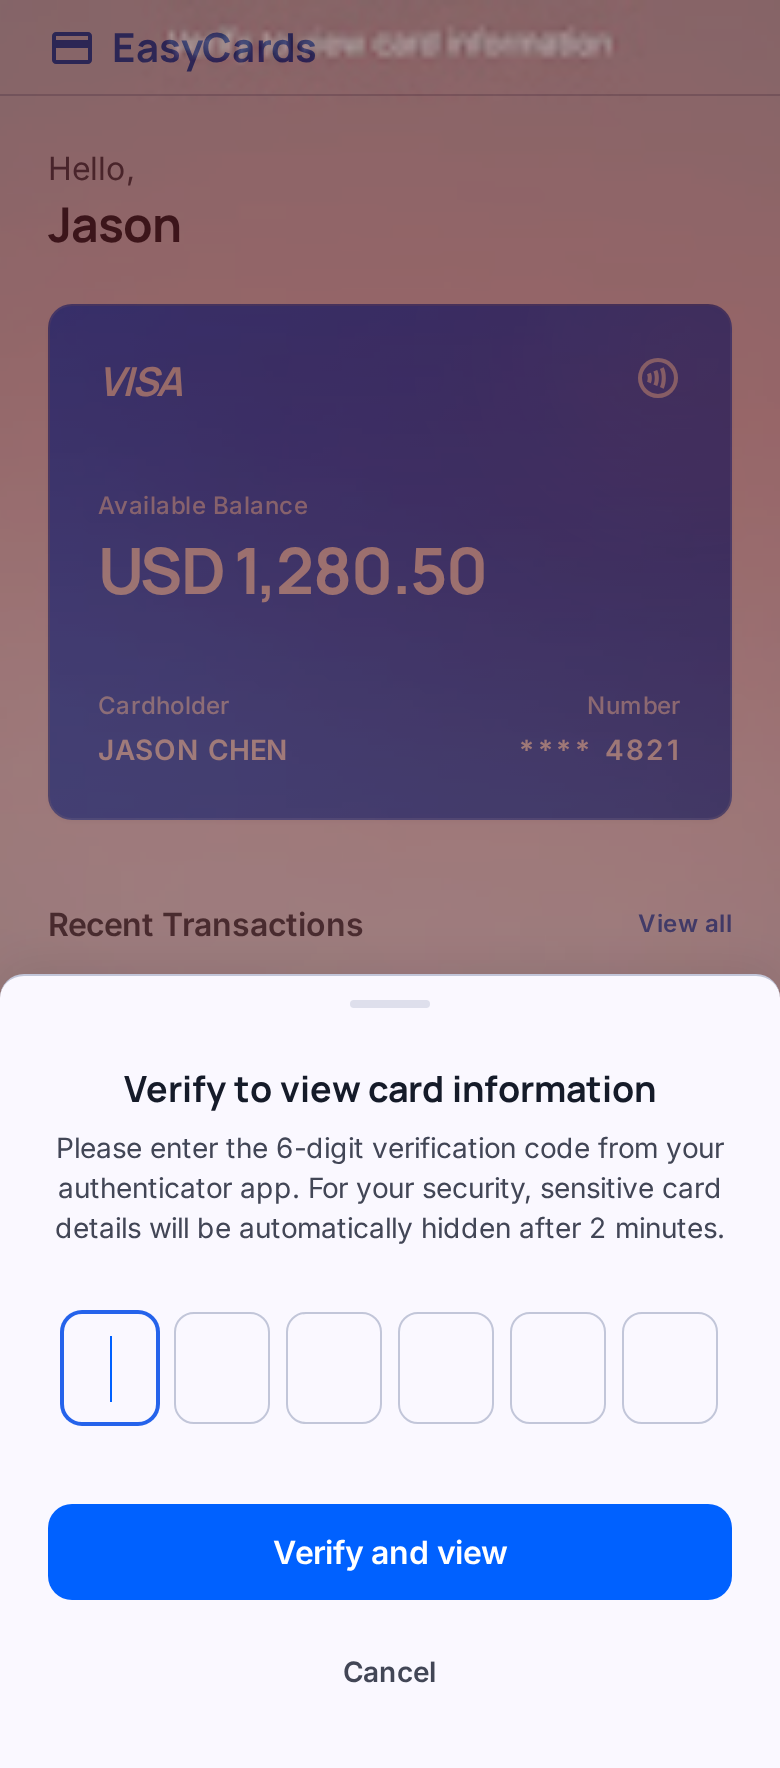
Sensitive data remains visible for no more than 120 seconds and is hidden automatically when the countdown ends. Closing the panel also clears the displayed data immediately.
Do not screenshot, forward, or store the full card number, CVV, or TOTP code in a messaging application. Never disclose a dynamic TOTP code to anyone.
7. Submit a card top-up request#
Request top-up is displayed only when the account permits requests and the selected card is in a normal state.
flowchart LR
  A[Cardholder submits a top-up request in H5] --> B[Synchronous request-submitted response]
  B -.Administrator reviews in Portal.-> C{Review result}
  C -->|Rejected| D[Request ends]
  C -->|Approved| E[Wait for top-up execution]
  E -.Asynchronous state update.-> F[Refresh card balance and transactions]
Steps:
- In My Cards, select the target card and verify the last four digits and currency.
- Select Request top-up.
- Enter an amount greater than zero.
- Optionally enter a note of up to 240 characters.
- Enter the current six-digit TOTP code.
- Select Send request.
- After Top-up request sent for approval appears, wait for the administrator to process it.
A successful submission means only that the request was sent for approval; it does not mean that the balance has increased. After the administrator approves and execution completes, refresh the balance and reconcile the top-up in Transactions. Contact the account administrator for the approval status.
8. Transactions and export#
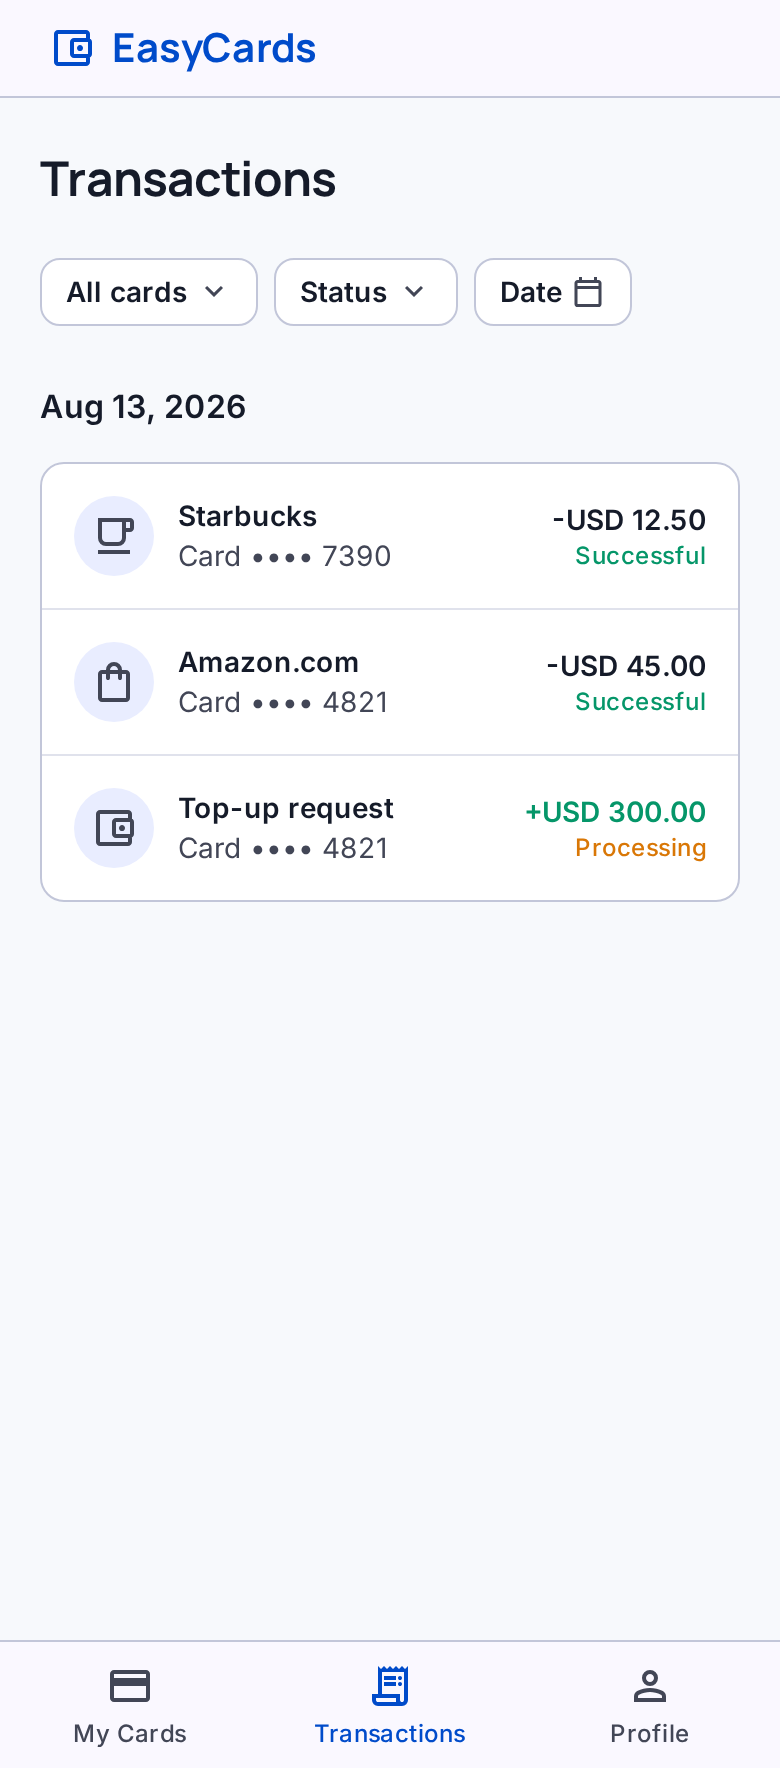
Open Transactions from the bottom navigation. The page supports these filters:
- all cards or one card selected by last four digits;
- success, pending, or failed status;
- last 30 days, last 90 days, or all time.
Select a transaction to view the information provided by the page. Select Load more when more records are available.
Select Export CSV to export all matching records for the current card, status, and time filters. The file name includes the export date. If export fails, check the network and try again. If it continues to fail, retain the filters and failure time and contact the account administrator.
9. Profile#
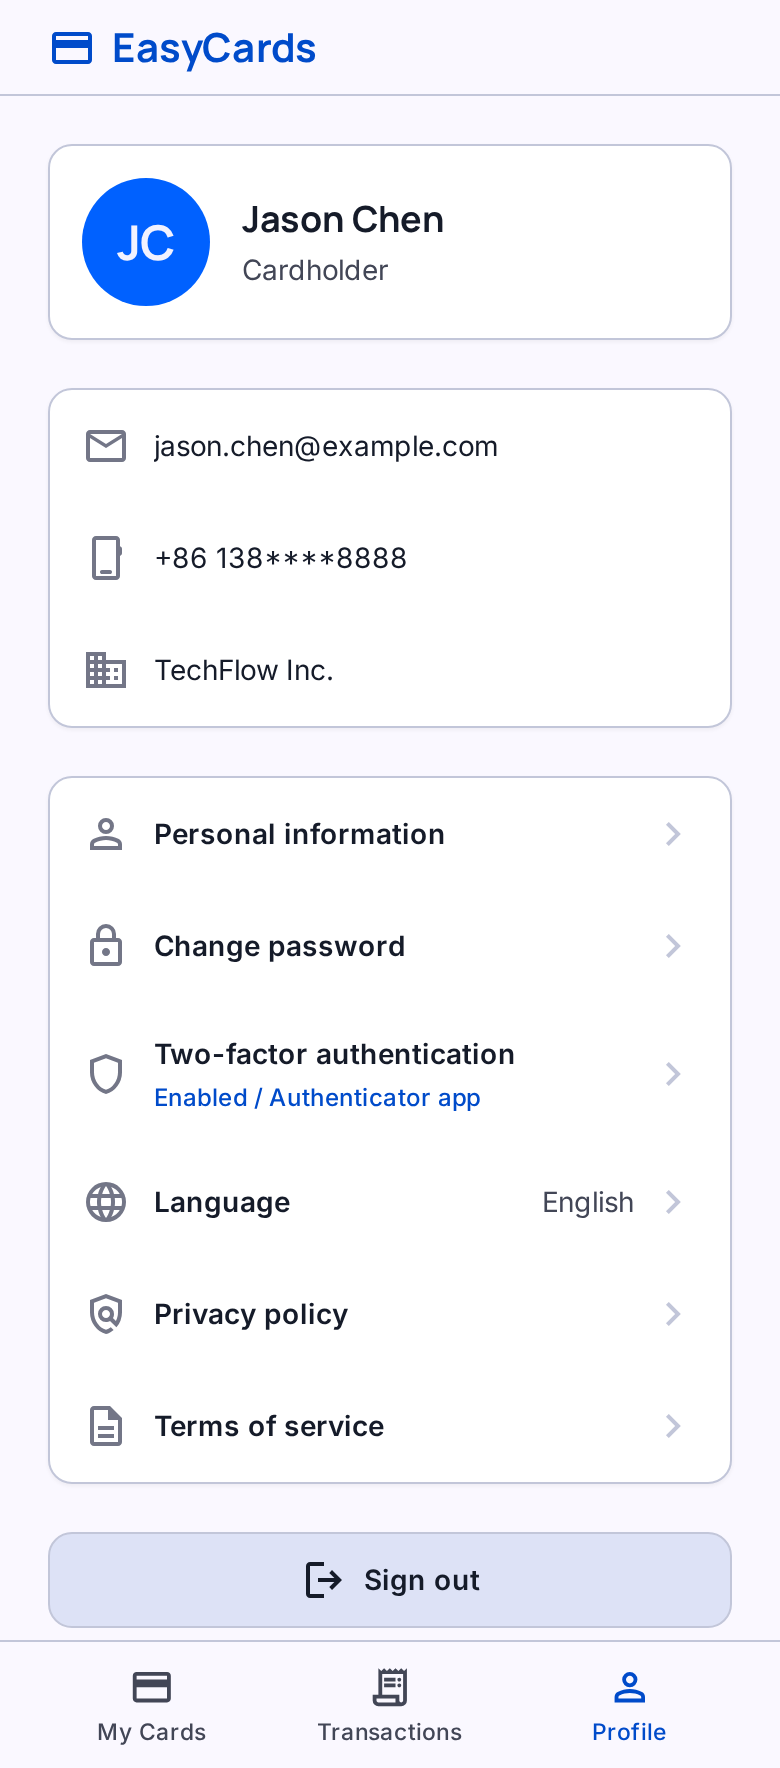
Open Profile from the bottom navigation to view:
- name, email, phone, and account;
- password-reset entry;
- TOTP status;
- Simplified Chinese or English language setting;
- Privacy Policy and Terms of Service;
- sign-out action.
9.1 Language#
Select Simplified Chinese or English under Language. Activation, sign-in, KYC, cards, transactions, and profile pages use the same language preference.
9.2 TOTP status#
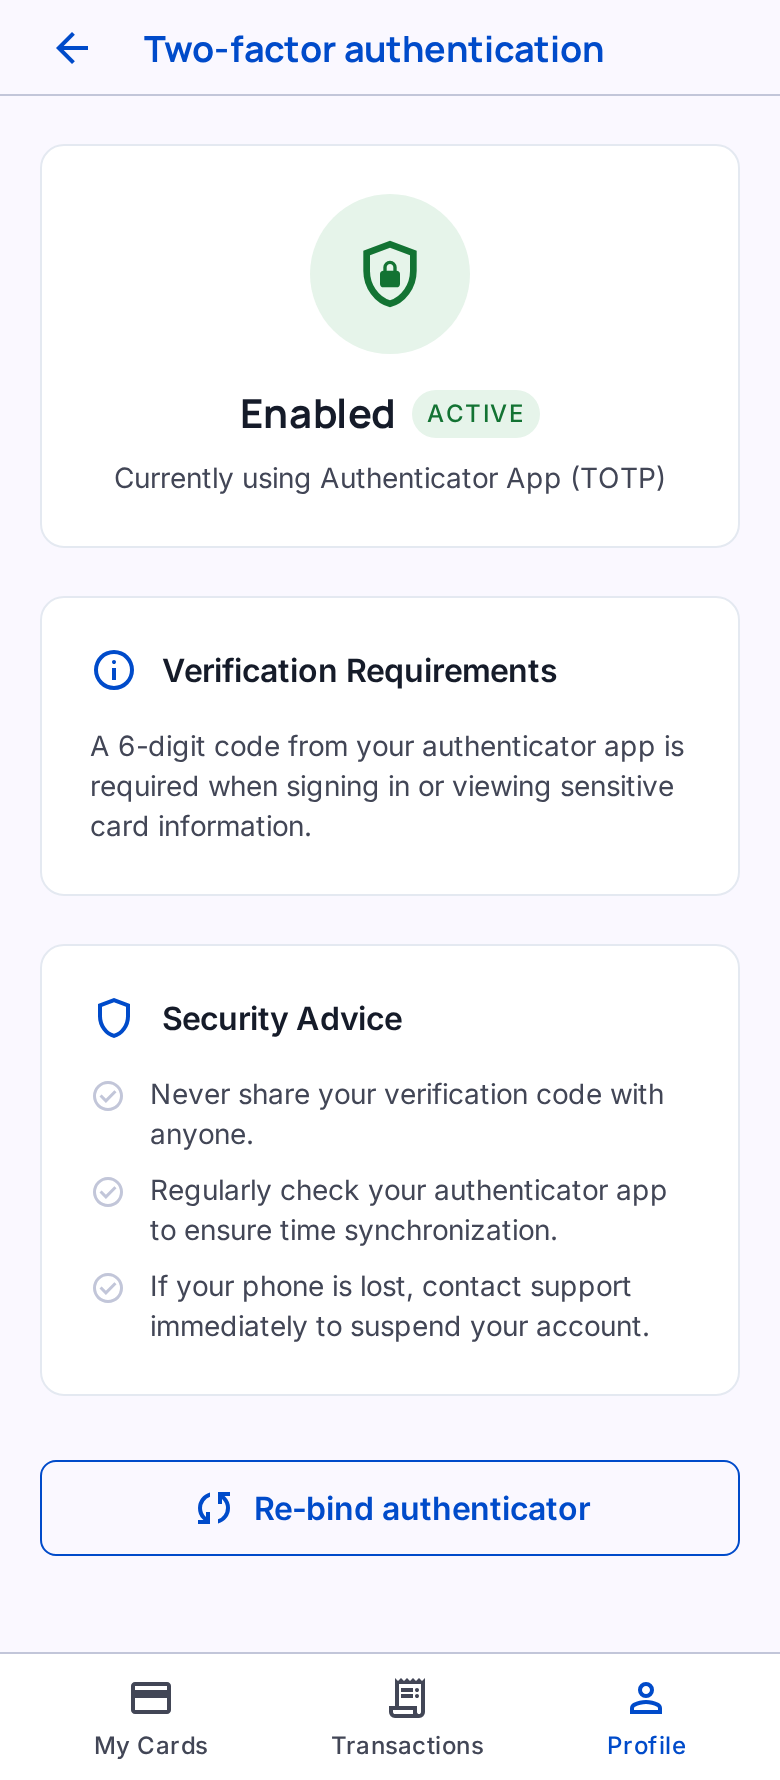
The Two-factor authentication page is read-only. It shows the current status, method, and security guidance, but it does not allow the cardholder to disable or reset TOTP. Contact the account administrator or EasyCards Support for a reset.
9.3 Sign out#
Select Sign out, then confirm in the dialog. Sign out after using a shared device or completing a sensitive card operation.
10. Errors and security#
| Situation | Action |
|---|---|
| Invitation invalid, expired, or already used | Ask the administrator for a new invitation; sign in directly if already activated |
| Account disabled | Contact the administrator to confirm the member status |
| Password forgotten | Use Forgot password? to request a reset email |
| TOTP device lost or verification unavailable | Stop repeated attempts and contact the administrator or EasyCards Support for a reset |
| No card displayed | Ask the administrator to confirm card assignment and opening status |
| KYC requires details or permits a retry | Open KYC from the card-application panel, correct the failure, and submit again |
| KYC or card opening continues to fail | Retain the application number, error, and time, then contact the administrator |
| Top-up request remains unprocessed | Contact the administrator for approval and execution status |
| Balance or transactions fail to load | Check the network and retry; do not treat a loading failure as a balance or transaction result |
When contacting the administrator, provide the invited email, card last four digits, application number or transaction time, and the displayed error. Never provide a sign-in password, full card number, CVV, or TOTP code.